PREV
NEXT
  • DDoS-Erkennungs-Software

    Wanguard findet volumetrische DDoS-Angriffe durch die Nutzung einer sehr schnellen und hoch-innovativen Engine zur Erkennung von Datenverkehr-Anomalien, die mehr als 130 verkehrsbezogene Metriken mit benutzerdefinierten Schwellenwerten vergleicht und das Online-Verhalten von Benutzern zur Erkennung von Spitzenwerten des Datenverkehrs graphisch darstellt. Es reagiert automatisch auf Bedrohungen, indem es vordefinierte Aktionsmodule ausführt, die Benachrichtigungs-E-Mails senden, Präfixe in BGP ankündigen, SNMP-Traps generieren, ACLs ändern und benutzerdefinierte Skripts mit Zugriff auf eine einfach zu verwendende API ausführen, die über 80 Datenverkehrsparameter aufzeigt. DDoS-Angriffe werden über Paket-Sniffing, SNMP-Abfragen oder mithilfe von herstellerunabhängigen Flow-basierten Technologien erkannt.

  • Vor-Ort-Service zur DDoS-Abwehr

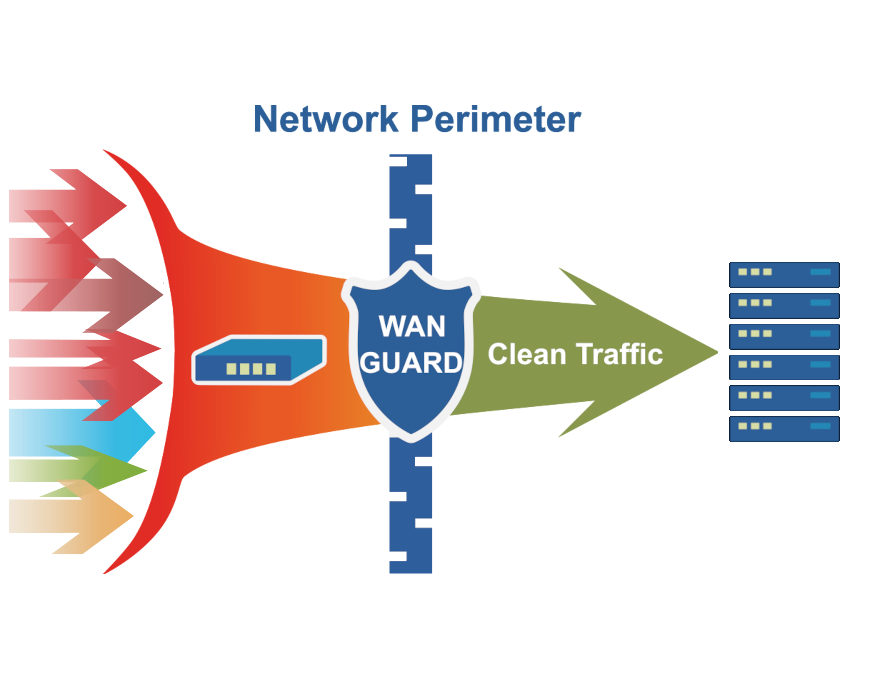
    Das Wanguard-Filter gewährleistet, dass bei Distributed-Denial-of-Service-Angriffen keine Ausfallzeiten für Kunden und Dienste entstehen, und das automatisch, ohne dass ein Eingreifen des Anwenders erforderlich ist. Es wurde als Abwehrsystem gegen DDoS-Angriffe entwickelt, dabei bereinigt es den schädlichen Datenverkehr vor Ort und benachrichtigt den Internetdienstanbieter des Angreifers . Jedes schädliche Paket wird mittels intelligenter, dynamischer Filterregeln blockiert, die auf zustandslosen Software- oder Hardwarefirewalls oder auf BGP FlowSpec-fähigen Routern angewendet werden. Es kann Seitenfilterung mit BGP On / Off-Ramping durchführen oder es kann auf dedizierten Paket-Scrubbing-Servern ausgeführt werden, die im Haupt-Datenpfad bereitgestellt werden.

  • Vollständige Sichtbarkeit des Netzwerkverkehrs

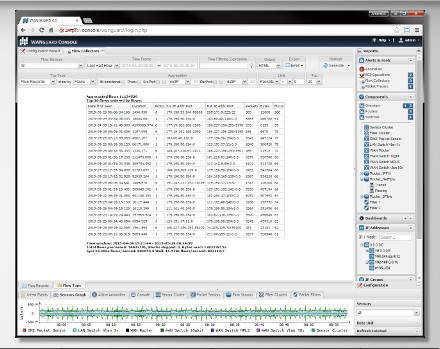
    Wanguard und Wansight bieten eine vollständige Sichtbarkeit des Datenverkehrs im Netzwerk durch die Verwendung verteilter Sensoren ("Probes"), die IP-Pakete erfassen, SNMP-Geräte abfragen und Flow-Aufzeichnungen von Cisco NetFlow, Huawei Netstream, Juniper jFlow, cflowd, sFlow und IPFIX analysieren können. Die Daten sind in einer webbasierten Benutzerschnittstelle zugänglich, die benutzerdefinierte Dashboards, Echtzeit-Verkehrsdiagramme und Top-Statistiken bereitstellt. Sie können schnell komplexe Analysen mit aggregierten Daten für Betreiber, Abteilungen, Schnittstellen, Anwendungen, Protokolle, autonome Systeme und Länder erstellen; genaue Bandbreitengraphen für Tausende von IP-Adressen betrachten, Pakete und Datenströme inspizieren.

  • Datenfluss-Erfassung und -Analyse

    Wanguard und Wansight beinhalten den Flow Sensor, einen voll funktionsfähigen Datenflussanalysator und -kollektor, der alle wichtigen Datenflusstechnologien (NetFlow Version 5, 7 und 9; IETF IPFIX; sFlow Version 4 und 5) unterstützt und eine hochgradig skalierbare Verkehrskorrelations-Engine enthält, die kontinuierlich Hunderttausende von IPv4- und IPv6-Adressen und -Bereiche überwachen kann. Die Datenflüsse können beliebig lange in einem komprimierten Binärformat gespeichert werden. Sie können Top-Listen und fast jeden denkbaren Gesamtbericht generieren. Mit den umfangreichen Ausdrucksoptionen zum Filtern von Flüssen können Sie einzelne Datenflüsse für forensische Ad-hoc-Recherchen schnell abfragen.

  • Paket-Sniffer und Nutzlast-Analyse

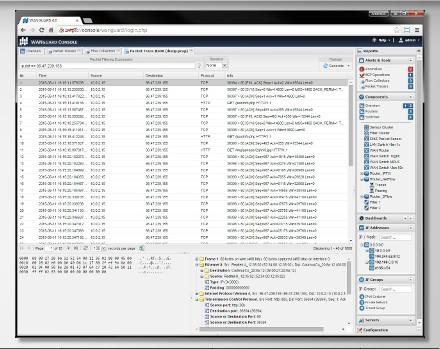
    Wanguard und Wansight enthalten den Packet Sensor, der IP-Pakete durch Schnüffeln von Port-gespiegelten 1/10/40 Gbps- oder Inline-Schnittstellen mit Drahtgeschwindigkeit prüft und eine vollständig skalierbare IP-Datenverkehrsanalyse-Engine enthält, die in Echtzeit Zehntausende von IPv4 und IPv6 Adressen und Bereichen überwachen kann. Benutzer können Paket-Dumps für forensische Untersuchungen oder zur Unterstützung der Fehlerdiagnose im Netzwerk speichern. Paket-Dumps können online heruntergeladen oder in einer Wireshark-ähnlichen Oberfläche angezeigt werden, die detaillierte Layer-7-Informationen oder hexadezimale Rohdaten und ASCI-Daten zur Einbindung in reguläre Ausdrücke anzeigt. Es unterstützt Libpcap, PF_RING Vanille, PF_RING ZC, Netmap und Sniffer 10G.

Wanguard and Wansight can be installed quickly and easily with the APT package manager on a stock Debian "Bullseye" Linux distribution. The software runs exclusively on 64-bit Intel or AMD architectures. Debian 11 will receive updates until June 2026.
Below you can find the installation steps for Console, Sensor and Filter.


USER GUIDES:   Wanguard 8.4 User Guide
Wansight 8.4 User Guide

CONSOLE
INSTALLATION
STEPS:
Step 1. Install the Andrisoft repository
Add the Andrisoft repository to the package manager.
debian:~# apt install apt-transport-https wget gnupg
debian:~# wget -O - https://www.andrisoft.com/andrisoft.gpg.key | gpg --dearmor --yes --output /usr/share/keyrings/andrisoft-keyring.gpg
debian:~# echo "deb [signed-by=/usr/share/keyrings/andrisoft-keyring.gpg] https://packages.andrisoft.com bullseye main" > /etc/apt/sources.list.d/andrisoft.list

Step 2. Install the packages
Install the wanconsole package and its dependencies. Configure and start systemd-timesyncd to prevent clock de-synchronization issues.
debian:~# apt update
debian:~# apt install wanconsole
debian:~# nano /etc/systemd/timesyncd.conf #add your NTP server or uncomment FallbackNTP
debian:~# timedatectl set-ntp true
debian:~# timedatectl status

Step 3. Configure MariaDB
By default, MariaDB is bound to the loopback interface so you must comment the bind-address parameter. If you use multiple servers, make sure that MariaDB is accessible from each one by opening port tcp/3306 in the firewall.
debian:~# nano /etc/mysql/mariadb.conf.d/50-server.cnf #comment the bind-address directive
debian:~# systemctl restart mariadb 

Step 4. Restart the Apache service
In php.ini go to the [Date] section and set date.timezone to the correct value from http://php.net/manual/en/timezones.php and then restart the Apache service.
debian:~# nano /etc/php/7.4/apache2/php.ini #set date.timezone
debian:~# nano /etc/php/7.4/cli/php.ini #set date.timezone
debian:~# systemctl restart apache2

Step 5. Install the database
Finish installing the Console by running the /opt/andrisoft/bin/install_console script. Enter the MariaDB root password or press Enter if none is set, and provide a password for a new database named "andrisoft". In Debian 11, the recommended database storage engine is Aria.
debian:~# /opt/andrisoft/bin/install_console

Step 6. Configure the WANsupervisor service
The WANsupervisor daemon must be installed and started on all systems. You have to run the /opt/andrisoft/bin/install_supervisor script to enter the Console's IP address and database password you set on step 5.
debian:~# /opt/andrisoft/bin/install_supervisor
debian:~# systemctl start WANsupervisor
debian:~# systemctl enable WANsupervisor

Step 7. Install InfluxDB
Install influxdb from https://portal.influxdata.com/downloads or from the link listed below and execute /opt/andrisoft/bin/install_influxdb to initialize the influxdb database.
debian:~# wget https://dl.influxdata.com/influxdb/releases/influxdb_1.8.10_amd64.deb
debian:~# dpkg -i ./influxdb_1.8.10_amd64.deb
debian:~# cp /etc/influxdb/influxdb.conf /etc/influxdb/influxdb.conf.backup
debian:~# cp /opt/andrisoft/etc/influxdb.conf /etc/influxdb/influxdb.conf
debian:~# systemctl restart influxdb
debian:~# /opt/andrisoft/bin/install_influxdb

Step 8. Access the Console
The Console web interface is accessible at http://<hostname>/wanguard or http://<hostname>/wansight, where <hostname> is the name or the IP of the server running the Console. The default username is "admin" with the password "changeme". It is highly recommended to install an SSL certificate in Apache to be able to connect to Console securely via HTTPS.
 
SENSOR
INSTALLATION 
STEPS:
Step 1. Install the Andrisoft repository
Add the Andrisoft repository to APT. You can skip these installation steps on the Console server.
debian:~# apt install apt-transport-https wget gnupg
debian:~# wget -O - https://www.andrisoft.com/andrisoft.gpg.key | gpg --dearmor --yes --output /usr/share/keyrings/andrisoft-keyring.gpg
debian:~# echo "deb [signed-by=/usr/share/keyrings/andrisoft-keyring.gpg] https://packages.andrisoft.com bullseye main" > /etc/apt/sources.list.d/andrisoft.list

Step 2. Install the packages
Install the wansensor package and dependencies. Configure and start systemd-timesyncd to prevent clock de-synchronization issues.
debian:~# apt update
debian:~# apt install wansensor
debian:~# nano /etc/systemd/timesyncd.conf #add your NTP server or uncomment FallbackNTP
debian:~# timedatectl set-ntp true
debian:~# timedatectl status

Step 3. Install, configure and start the WANsupervisor service
This step is required if you haven't previously installed and configured WANsupervisor on the target system. In order to configure the WANsupervisor service, you have to run the /opt/andrisoft/bin/install_supervisor script to enter the Console's IP address and database password.
debian:~# /opt/andrisoft/bin/install_supervisor
debian:~# systemctl start WANsupervisor
debian:~# systemctl enable WANsupervisor

Step 4. Setup the Sensor
Log into the Console to set up the Sensor(s). Sensors are started, monitored, and stopped by the WANsupervisor daemon, so make sure the WANsupervisor service is always running.
 
FILTER
INSTALLATION
STEPS:
Step 1. Install the Andrisoft repository
Add the Andrisoft repository to APT. You can skip these installation steps on the Console server.
debian:~# apt install apt-transport-https wget gnupg
debian:~# wget -O - https://www.andrisoft.com/andrisoft.gpg.key | gpg --dearmor --yes --output /usr/share/keyrings/andrisoft-keyring.gpg
debian:~# echo "deb [signed-by=/usr/share/keyrings/andrisoft-keyring.gpg] https://packages.andrisoft.com bullseye main" > /etc/apt/sources.list.d/andrisoft.list
Step 2. Install the packages
Install the wanfilter package and dependencies. Configure and start systemd-timesyncd to prevent clock de-synchronization issues.
debian:~# apt update
debian:~# apt install wanfilter
debian:~# nano /etc/systemd/timesyncd.conf #add your NTP server or uncomment FallbackNTP
debian:~# timedatectl set-ntp true
debian:~# timedatectl status

Step 3. Install, configure and start the WANsupervisor service
This step is required if you haven't previously installed and configured WANsupervisor on the target system. In order to configure the WANsupervisor service, you have to run the /opt/andrisoft/bin/install_supervisor script to enter the Console's IP address and database password.
debian:~# /opt/andrisoft/bin/install_supervisor
debian:~# systemctl start WANsupervisor
debian:~# systemctl enable WANsupervisor

Step 4. Setup the Filter
Log in to the Console to set up Filter(s). Filters are started, monitored and stopped by the WANsupervisor daemon, so make sure the WANsupervisor service is always running.

Wanguard and Wansight can be installed quickly and easily with the APT package manager on a stock Debian "Bookworm" Linux distribution. The software runs exclusively on 64-bit Intel or AMD architectures. Debian 12 will receive updates until June 2028.
Below you can find the installation steps for Console, Sensor and Filter.


USER GUIDES:   Wanguard 8.4 User Guide
Wansight 8.4 User Guide

CONSOLE
INSTALLATION
STEPS:
Step 1. Install the Andrisoft repository
Add the Andrisoft repository to the package manager.
debian:~# apt install apt-transport-https wget gnupg
debian:~# wget -O - https://www.andrisoft.com/andrisoft.gpg.key | gpg --dearmor --yes --output /usr/share/keyrings/andrisoft-keyring.gpg
debian:~# echo "deb [signed-by=/usr/share/keyrings/andrisoft-keyring.gpg] https://packages.andrisoft.com bookworm main" > /etc/apt/sources.list.d/andrisoft.list
debian:~# apt update

Step 2. Install and configure MariaDB
By default, MariaDB is bound to the loopback interface so you must comment the bind-address parameter. If you use multiple servers, make sure that MariaDB is accessible from each one by opening port tcp/3306 in the firewall.
debian:~# apt install mariadb-server
debian:~# nano /etc/mysql/mariadb.conf.d/50-server.cnf #comment the bind-address directive
debian:~# systemctl restart mariadb 

Step 3. Install the packages
Install the wanconsole package and its dependencies. Configure and start systemd-timesyncd to prevent clock de-synchronization issues.
debian:~# apt install wanconsole
debian:~# nano /etc/systemd/timesyncd.conf #add your NTP server or uncomment FallbackNTP
debian:~# timedatectl set-ntp true
debian:~# timedatectl status

Step 4. Restart the Apache service
In php.ini go to the [Date] section and set date.timezone to the correct value from http://php.net/manual/en/timezones.php and then restart the Apache service.
debian:~# nano /etc/php/8.2/apache2/php.ini #set date.timezone
debian:~# nano /etc/php/8.2/cli/php.ini #set date.timezone
debian:~# systemctl restart apache2

Step 5. Install the database
Finish installing the Console by running the /opt/andrisoft/bin/install_console script. Enter the MariaDB root password or press Enter if none is set, and provide a password for a new database named "andrisoft". In Debian 12, the recommended database storage engine is Aria.
debian:~# /opt/andrisoft/bin/install_console

Step 6. Configure the WANsupervisor service
The WANsupervisor daemon must be installed and started on all systems. You have to run the /opt/andrisoft/bin/install_supervisor script to enter the Console's IP address and database password you set on step 5.
debian:~# /opt/andrisoft/bin/install_supervisor
debian:~# systemctl start WANsupervisor
debian:~# systemctl enable WANsupervisor

Step 7. Install InfluxDB
Install influxdb from https://portal.influxdata.com/downloads or from the link listed below and execute /opt/andrisoft/bin/install_influxdb to initialize the influxdb database.
debian:~# wget https://dl.influxdata.com/influxdb/releases/influxdb_1.8.10_amd64.deb
debian:~# dpkg -i ./influxdb_1.8.10_amd64.deb
debian:~# cp /etc/influxdb/influxdb.conf /etc/influxdb/influxdb.conf.backup
debian:~# cp /opt/andrisoft/etc/influxdb.conf /etc/influxdb/influxdb.conf
debian:~# systemctl restart influxdb
debian:~# /opt/andrisoft/bin/install_influxdb

Step 8. Access the Console
The Console web interface is accessible at http://<hostname>/wanguard or http://<hostname>/wansight, where <hostname> is the name or the IP of the server running the Console. The default username is "admin" with the password "changeme". It is highly recommended to install an SSL certificate in Apache to be able to connect to Console securely via HTTPS.
 
SENSOR
INSTALLATION 
STEPS:
Step 1. Install the Andrisoft repository
Add the Andrisoft repository to APT. You can skip these installation steps on the Console server.
debian:~# apt install apt-transport-https wget gnupg
debian:~# wget -O - https://www.andrisoft.com/andrisoft.gpg.key | gpg --dearmor --yes --output /usr/share/keyrings/andrisoft-keyring.gpg
debian:~# echo "deb [signed-by=/usr/share/keyrings/andrisoft-keyring.gpg] https://packages.andrisoft.com bookworm main" > /etc/apt/sources.list.d/andrisoft.list

Step 2. Install the packages
Install the wansensor package and dependencies. Configure and start systemd-timesyncd to prevent clock de-synchronization issues.
debian:~# apt update
debian:~# apt install wansensor
debian:~# nano /etc/systemd/timesyncd.conf #add your NTP server or uncomment FallbackNTP
debian:~# timedatectl set-ntp true
debian:~# timedatectl status

Step 3. Install, configure and start the WANsupervisor service
This step is required if you haven't previously installed and configured WANsupervisor on the target system. In order to configure the WANsupervisor service, you have to run the /opt/andrisoft/bin/install_supervisor script to enter the Console's IP address and database password.
debian:~# /opt/andrisoft/bin/install_supervisor
debian:~# systemctl start WANsupervisor
debian:~# systemctl enable WANsupervisor

Step 4. Setup the Sensor
Log into the Console to set up the Sensor(s). Sensors are started, monitored, and stopped by the WANsupervisor daemon, so make sure the WANsupervisor service is always running.
 
FILTER
INSTALLATION
STEPS:
Step 1. Install the Andrisoft repository
Add the Andrisoft repository to APT. You can skip these installation steps on the Console server.
debian:~# apt install apt-transport-https wget gnupg
debian:~# wget -O - https://www.andrisoft.com/andrisoft.gpg.key | gpg --dearmor --yes --output /usr/share/keyrings/andrisoft-keyring.gpg
debian:~# echo "deb [signed-by=/usr/share/keyrings/andrisoft-keyring.gpg] https://packages.andrisoft.com bookworm main" > /etc/apt/sources.list.d/andrisoft.list

Step 2. Install the packages
Install the wanfilter package and dependencies. Configure and start systemd-timesyncd to prevent clock de-synchronization issues.
debian:~# apt update
debian:~# apt install wanfilter
debian:~# nano /etc/systemd/timesyncd.conf #add your NTP server or uncomment FallbackNTP
debian:~# timedatectl set-ntp true
debian:~# timedatectl status

Step 3. Install, configure and start the WANsupervisor service
This step is required if you haven't previously installed and configured WANsupervisor on the target system. In order to configure the WANsupervisor service, you have to run the /opt/andrisoft/bin/install_supervisor script to enter the Console's IP address and database password.
debian:~# /opt/andrisoft/bin/install_supervisor
debian:~# systemctl start WANsupervisor
debian:~# systemctl enable WANsupervisor

Step 4. Setup the Filter
Log in to the Console to set up Filter(s). Filters are started, monitored and stopped by the WANsupervisor daemon, so make sure the WANsupervisor service is always running.

Wanguard and Wansight can be installed using the APT package manager. The software runs exclusively on 64-bit / amd64 architectures.
All packages were tested on a stock Debian 8 "Jessie". Debian 8 received updates until 2020-06-30!


USER GUIDES:   Wanguard 8.2 User Guide
Wansight 8.2 User Guide

CONSOLE
INSTALLATION
STEPS:
Step 1. Install the Andrisoft repository
Add the Andrisoft repository to APT.
debian:~# apt-get install apt-transport-https wget gnupg
debian:~# wget --no-check-certificate -O - https://www.andrisoft.com/andrisoft.gpg.key | apt-key add -
debian:~# echo "deb https://www.andrisoft.com/files/debian8 jessie main" > /etc/apt/sources.list.d/andrisoft.list

Step 2. Install the packages
Install the wanconsole package and dependencies. Configure and start ntpd to prevent clock de-synchronization issues.
debian:~# apt-get update
debian:~# apt-get install wanconsole
debian:~# service ntp start
debian:~# systemctl enable ntp

Step 3. Configure the MySQL service
By default, MySQL is bound to the loopback interface so you must comment the bind-address parameter. If you deploy the Sensor or the Filter on remote systems, make sure that the MySQL server is accessible by opening port tcp/3306 in the firewall.
debian:~# nano /etc/mysql/my.cnf #comment the bind-address directive, set max_connections=1000, open_files_limit=5000, max_allowed_packet=200M and add skip-name-resolve in the [mysqld] section
debian:~# service mysql restart 

Step 4. Restart the Apache service
Reload the PHP configuration by restarting the Apache service.
debian:~# service apache2 restart

Step 5. Install the Console's database
Finish installing the Console by running the /opt/andrisoft/bin/install_console script. Enter the MySQL root password, and provide a new password for the Console's database. In Debian 8, the recommended database storage engine is MyISAM.
debian:~# /opt/andrisoft/bin/install_console

Step 6. Configure the Supervisor
The WANsupervisor daemon must be installed and started on all systems. You have to run the /opt/andrisoft/bin/install_supervisor script to enter the Console's IP address and database password you set on step 5.
debian:~# /opt/andrisoft/bin/install_supervisor
debian:~# systemctl start WANsupervisor
debian:~# systemctl enable WANsupervisor

Step 7. Install InfluxDB
Install influxdb from https://portal.influxdata.com/downloads or from the link listed below and execute /opt/andrisoft/bin/install_influxdb to initialize the influxdb database.
debian:~# wget https://dl.influxdata.com/influxdb/releases/influxdb_1.8.10_amd64.deb
debian:~# dpkg -i ./influxdb_1.8.10_amd64.deb
debian:~# cp /etc/influxdb/influxdb.conf /etc/influxdb/influxdb.conf.backup
debian:~# cp /opt/andrisoft/etc/influxdb.conf /etc/influxdb/influxdb.conf
debian:~# systemctl restart influxdb
debian:~# /opt/andrisoft/bin/install_influxdb

Step 8. Access the Console
The Console web interface is accessible by pointing your web browser to http://<hostname>/wanguard or http://<hostname>/wansight, where <hostname> is the name of the server running the Console. The default username is "admin" with the password "changeme".
 
SENSOR
INSTALLATION 
STEPS:
Step 1. Install the Andrisoft repository
Add the repository to APT if it's not already installed.
debian:~# apt-get install apt-transport-https wget gnupg
debian:~# wget --no-check-certificate -O - https://www.andrisoft.com/andrisoft.gpg.key | apt-key add -
debian:~# echo "deb https://www.andrisoft.com/files/debian8 jessie main" > /etc/apt/sources.list.d/andrisoft.list

Step 2. Install the packages
Install the wansensor package and dependencies. Configure and start ntpd to prevent clock de-synchronization issues.
debian:~# apt-get update
debian:~# apt-get install wansensor
debian:~# service ntp start
debian:~# systemctl enable ntp

Step 3. Install, configure and start the Supervisor
This step is required if you haven't previously installed and configured WANsupervisor on the target system. In order to configure the Supervisor, you have to run the /opt/andrisoft/bin/install_supervisor script to enter the Console's IP address and database password.
debian:~# /opt/andrisoft/bin/install_supervisor
debian:~# systemctl start WANsupervisor
debian:~# systemctl enable WANsupervisor

Step 4. Setup the Sensor
Log into the Console to setup the Sensor(s). Sensors are started, monitored and stopped by the WANsupervisor daemon, so make sure the WANsupervisor service is always running.
 
FILTER
INSTALLATION
STEPS:
Step 1. Install the Andrisoft repository
Add the repository to APT if it's not already installed.
debian:~# apt-get install apt-transport-https wget gnupg
debian:~# wget --no-check-certificate -O - https://www.andrisoft.com/andrisoft.gpg.key | apt-key add -
debian:~# echo "deb https://www.andrisoft.com/files/debian8 jessie main" > /etc/apt/sources.list.d/andrisoft.list

Step 2. Install the packages
Install the wanfilter package and dependencies. Configure and start ntpd to prevent clock de-synchronization issues.
debian:~# apt-get update
debian:~# apt-get install wanfilter
debian:~# service ntp start
debian:~# systemctl enable ntp

Step 3. Install, configure and start the Supervisor
This step is required if you haven't previously installed and configured WANsupervisor on the target system. In order to configure the Supervisor, you have to run the /opt/andrisoft/bin/install_supervisor script to enter the Console's IP address and database password.
debian:~# /opt/andrisoft/bin/install_supervisor
debian:~# systemctl start WANsupervisor
debian:~# systemctl enable WANsupervisor

Step 4. Setup the Filter
Log in to the Console to set up Filter(s). Filters are started, monitored and stopped by the WANsupervisor daemon, so make sure the WANsupervisor service is always running.

Support Terms

Unser Wissen und unsere praktische Erfahrung helfen Ihnen dabei, sich zu vergewissern, dass Ihr Unternehmen über die technische Infrastruktur und die organisatorische Kapazität verfügt, um die laufende Implementierung von Andrisoft-Lösungen zu unterstützen. Andrisoft bietet die folgenden Dienstleistungen für eine erfolgreiche Implementierung und Wartung unserer Software:

Weiterleitung von Support-Anfragen:

  1. Eine Email-Adresse für die technische Unterstützunh: support andrisoft.com
  2. Ein Support Portal Webschnittstelle

Standard Support Service während der folgenden Geschäftszeiten:
Montag bis Freitag 10:00 Uhr bis 20:00 Uhr GMT, mit Ausnahme gesetzlicher Feiertage.

Standard Support umfasst:
   •  Softwarewartung einschließlich Updates und neuer Versionen der Software, die Andrisoft seinen Lizenznehmern zur Verfügung stellt.
   •  Sie haben Anspruch auf technische Unterstützung während der angegebenen Zeiten via Email oder Internet
   •  Maximale Antwortzeit ist 48 Stunden.
   •  Sie können Ihren Lizenzschlüssel jederzeit kostenlos erneut anfordern.

In der Welt der Netzwerkwartung und -sicherheit gibt es wenig Spielraum für Fehler. Aus diesem Grund setzen wir alles daran, um die Zufriedenheit und den Erfolg unserer Kunden zu gewährleisten. Deshalb bieten wir jährliche Support-Vereinbarungen für Unternehmen (Enterprise-Support) an. Für mehr Informationen zu den Vereinbarungen kontaktieren Sie bitte einen Mitarbeiter von Andrisoft.

Enterprise Support umfasst:
   •  Service Level-Vereinbarungen.
   •  Managed Security Services einschließlich täglicher Überwachung und Interpretation wichtiger Systemereignisse, DDoS-Attacken und Trendanalysen.
   •  Softwarewartung einschließlich Updates und neuer Versionen der Software, die Andrisoft seinen Lizenznehmern zur Verfügung stellt.
   •  Sie haben Anspruch auf Remote-Support per Telefon, E-Mail, Skype oder Internet.
   •  1 Stunde maximale Antwortzeit.
   • Verfügbarkeit: rund um die Uhr.
   •  Sie können Ihren Lizenzschlüssel jederzeit kostenlos erneut anfordern.
   •  Zugang zu den Andrisoft-Labs zum Herunterladen von angepassten und optimierten Versionen für eine größere Bandbreite von Architekturen.

Die verschiedenen technischen Probleme benötigen unterschiedlich viel Zeit für die Lösungsfindung. Sollten Sie jedoch Fragen oder Probleme im Zusammenhang mit der Verwendung von Andrisoft-Produkten haben, prüfen Sie zunächst die KNOWLEDGE BASE. Wenn dort kein Ratschlag zu Ihrem speziellen Problem verfügbar ist, senden Sie bitte eine E-Mail an support andrisoft.com mit einer Beschreibung Ihres Problems. Antworten auf die häufigsten Fragen finden Sie in der KNOWLEDGE BASE auf der Support-Seite. Bitte geben Sie dort die folgenden Informationen an: Servertyp, CPU, RAM, NIC, Betriebssystemversion und -verteilung sowie eine detaillierte Beschreibung des Problems. Wenn sich das Problem bestätigt, werden wir unser Bestes tun, um es in kürzester Zeit zu beheben und auf der Webseite ein Update für Andrisoft-Benutzer zum Download bereitzustellen.

IP-ÜBERWACHUNG UND ANTI-DDOS SOFTWARE

Andrisoft entwickelt zwei innovative und kostengünstige Linux-basierte Anwendungen, die für Netzwerkadministratoren und Sicherheitsexperten von Organisationen unentbehrlich sind, die große IP-Netzwerke betreiben wie Telekommunikationsunternehmen, Internetdienstanbieter, Cloud Hosting Rechenzentren, Content Delivery Networks oder DDoS-Abwehrdienste:

Wansight bietet Bandbreiten-Überwachung, IP-Accounting und eingehende Datenflussanalysen. Es bietet Flow Sensors das die von Cisco exportierten Flussdatensätze verarbeitet NetFlow, IPFIX, und sFlow, und es beinhaltet auch Packet Sensors das kann analysieren Inline-Verkehr, network TAPs oder port mirroring. Eine OS-unabhängige, webbasierte Console bietet Single-Point-Management und Reporting.

Wanguard enthält alle Funktionen von Wansight und fügt erweiterte DDoS-Erkennung hinzu und Abschwächung Fähigkeiten. Es ist entworfen, um Netzwerke und kritische Dienste vor Distributed Denial of Service zu schützen, indem sie schädliche Pakete mit Hilfe von dynamischen Filterregeln auf Software- oder Hardware-Firewalls, die sich am Netzwerkumkreis befinden, schrubben. Es unterstützt automatisierte Reaktionswerkzeuge, RTBH, BGP FlowSpec, Verkehrsumleitung, Scripting und Server Clustering.

DDoS Schutz in 5 einfachen Schritten

alt Probieren Wanguard, Softwarelösung zur Überwachung und zum Schutz großer Netzwerke gegen DDoS-Angriffe.

alt Füllen Sie das Formular zur Beantragung des Software-Tests aus, um einen kostenlosen Test-lizenzschlüssel für 30 Tage zu erhalten.

alt Erstellen Sie Ihre eigene DDoS-Abwehranwendung, indem Sie die Software auf einem freien Linux-Server installieren.

alt Nutzen Sie die voll funktionsfähige Testversion für 30 Tage. Unsere Ingenieure unterstützen Sie während dieser Zeit kostenlos.

alt Kaufen Sie die zu jeder Zeit verfügbaren Software-Jahreslizenzen über unseren Online-Shop zum günstigen Preis.

Wanguard 8.4 was released! Changelog and upgrade instructions at: https://t.co/4UIyox14bQ.
Follow Andrisoft on Twitter (X)
Join our Newsletter to receive the latest news from us!

  OUR CLIENTS  

  • Telecom Operators: HUAWEI | VODAFONE | ORANGE | JT GLOBAL | BITE LITHUANIA | MOLDTELECOM | JUPITER TELECOMMUNICATIONS

  • Internet Service Providers: GOOGLE FIBER | YELLOWFIBER | SKYLOGIC EUTELSAT | 1&1 VERSATEL | NETCOLOGNE | SOLCON NETHERLANDS

  • Cloud / VPS Hosting Providers: DIGITALOCEAN | LEASEWEB | FLEXENTIAL | WEEBLY | VPS.NET | EAPPS | SERVERPOINT

  • Software & Services: IBM CORPORATION | MOZILLA CORPORATION | NAMECHEAP | GANDI SAS | ALLEGRO | MBANK | TF1 FRANCE

  • Security / Anti-DDoS Services: GIGENET | BLACKLOTUS | KODDOS | ROKASECURITY | DOSARREST | SERVERIUS

  • Data Centers: EQUINIX | PHOENIXNAP | CORE-BACKBONE | BSO NETWORK | ASCENTY | PLUSSERVER | MYLOC MANAGED IT